
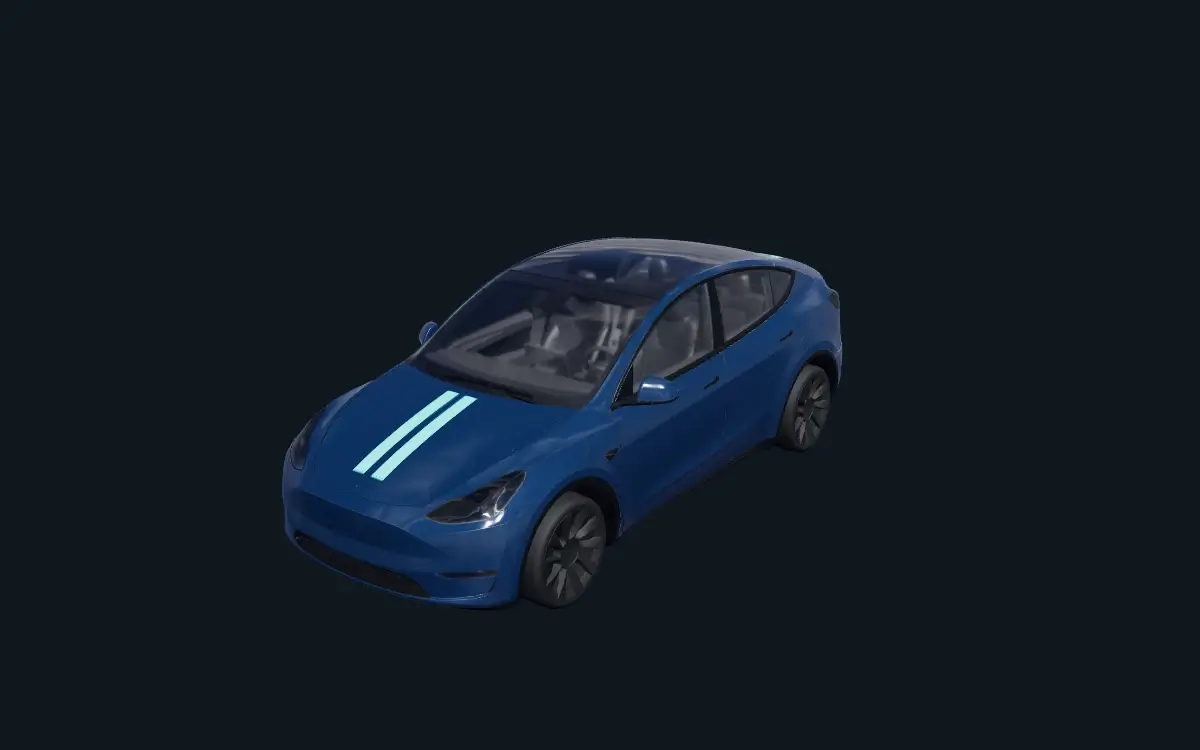
Create a custom Tesla wrap by choosing the template for your exact vehicle, adding your artwork in the editor, checking the result in 3D, and exporting a PNG. The PNG is a texture for the vehicle shown in Paint Shop and does not change your car's physical paintwork. Check the model and variant before placing your artwork; a template for another vehicle can put a graphic on the wrong panel. This guide takes you through the design process and leaves the transfer steps to the separate upload guide.
Choose the vehicle before starting the artwork
Open the vehicle selector and match your model, year range, and variant to the available editor. Check the distinction between standard and performance versions where separate templates are listed. A file labelled Model 3 is not enough information if the available templates distinguish an earlier vehicle from a 2024+ version. Make that choice before spending time placing a logo or lining up a stripe.
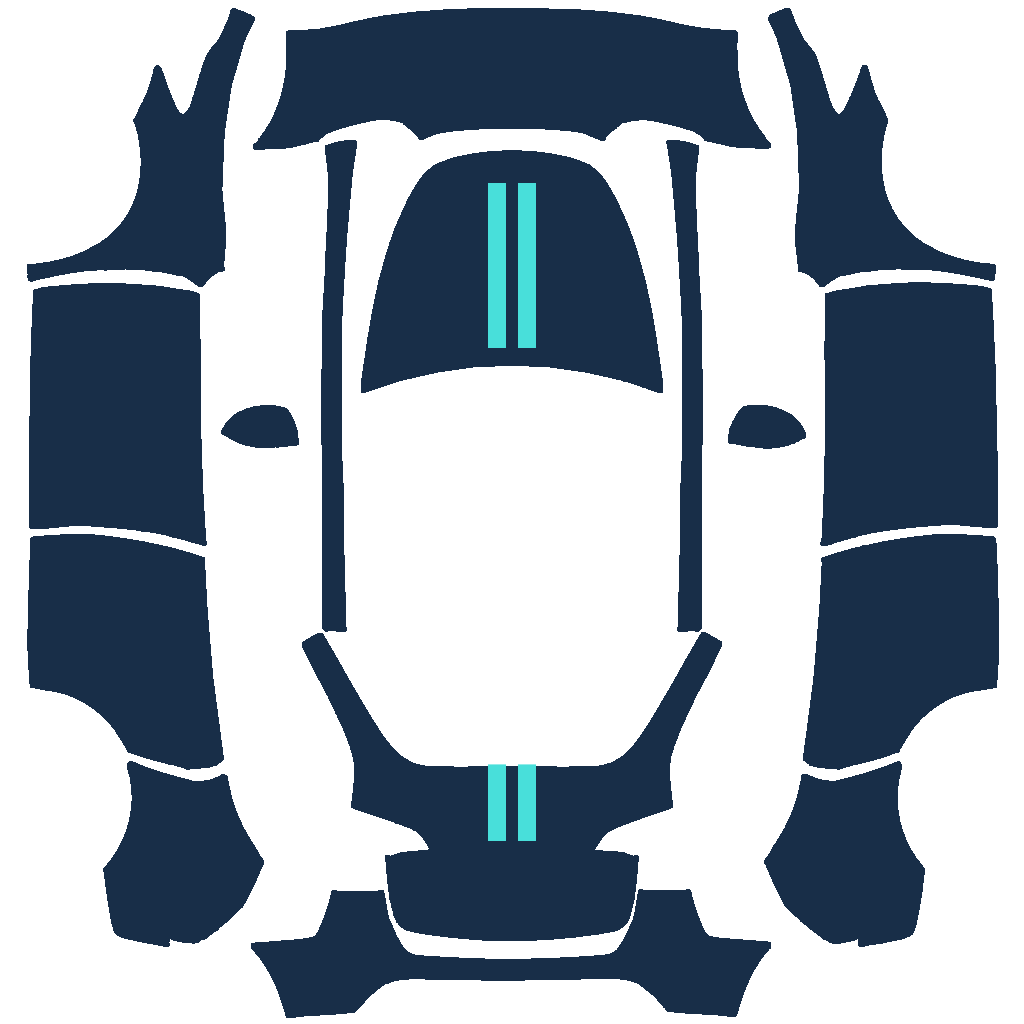
The template is a flat arrangement of the surfaces on the digital car. Areas that sit next to each other in the image do not necessarily touch on the vehicle, and adjacent body panels can occupy different parts of the texture. Use the template boundaries to understand where each part of your design belongs. A square picture becomes a usable wrap through that mapping, rather than simply through its dimensions.
Start with a template or an existing design
You can begin with a blank vehicle template or use a model-specific design as a starting point. The original templates show complete designs and identify the vehicle they belong to. Browse them to see how colours and graphics work across different panels, then choose a compatible example if you want a base to edit. Keep the vehicle information beside the artwork while comparing options.
Starting from an existing design is useful when your goal is a colour variation or a different arrangement of familiar elements. Starting from the blank template gives you room to place your own artwork from the beginning. Both routes still require checking the result on the correct 3D model. Changing the filename of a template does not convert its panel layout to another vehicle.
Place graphics within the mapped panels
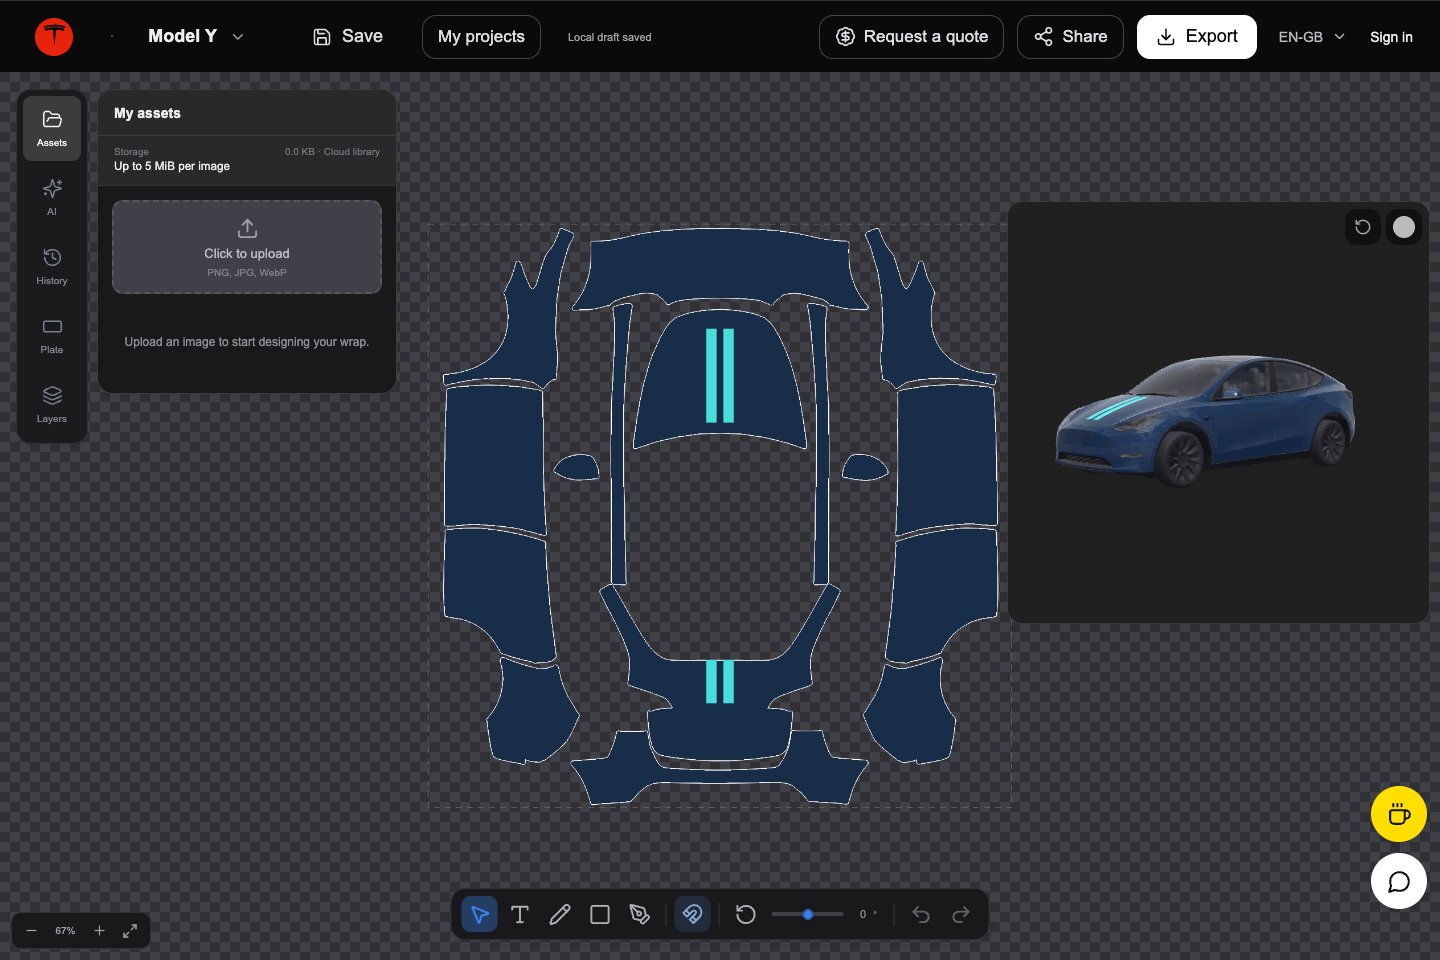
Use the editor to add images, text, shapes, and colours to the template. Position the most recognisable part of a logo or illustration within the panel where you want it to appear. Resize or rotate the element while comparing the flat layout with the vehicle preview. Keep important lettering away from a seam until you have checked how the two surfaces meet.
For a first design, a clear base colour and a deliberately positioned graphic make it easier to judge alignment. If you place artwork on both doors, inspect each side instead of assuming that the other side reads correctly. The different orientation of template sections can change how text and directional graphics appear. Adjust placement against the preview rather than relying on the flat image alone.
Use the 3D preview to inspect the whole car
The preview helps you see how a flat texture is applied to the body. Rotate the vehicle and examine the bonnet, doors, roof, wings, and bumpers. Look for a graphic that disappears around an edge or a stripe that changes direction across a panel boundary. Return to the artwork and revise that element before reviewing the same angle again.
A preview is especially useful for text, logos, and repeated patterns because a small mapping error can be noticeable on them. Check the front, rear, and both sides rather than judging the design from a single attractive angle. Give the parts of the design that cross several surfaces an additional look. The purpose is to verify placement on the digital vehicle, not to predict the appearance of a physical vinyl installation.
Correct seams and orientation before exporting
If the design looks stretched, first confirm that the editor is using the intended vehicle template. Then check whether the affected graphic crosses separate mapped panels. Move or resize it and inspect the result again instead of trying to fix a mapping problem later inside the Tesla app. The transfer process does not redraw the texture for your vehicle.
Keep the flat layout and the 3D result together when deciding whether a design is ready. An unusual-looking arrangement in the PNG can be correct once it is wrapped around the vehicle. Conversely, a tidy composition in the flat image can place a logo upside down or across a cut in the bodywork. Judge the exported artwork by its intended mapping rather than by how neatly the loose panels appear on the canvas.
Export the wrap as a real PNG file
Choose the editor's PNG export when the preview looks right. An editable project file and a screenshot of the preview serve different purposes and should not be substituted for the wrap texture. Keep a recognisable filename so you can find the exported design among your other downloads. Open the saved file's information to check what was actually written to your device.
Tesla's documented image range is 512×512 to 1024×1024 pixels, with a maximum file size of 1 MB. Match the template's native dimensions where possible and check the final PNG rather than an earlier source image. The site's export should not be treated as a guarantee that every possible design will already meet the file-size limit. If the file exceeds it, reduce the artwork's complexity or optimise the PNG while keeping it inside the supported dimensions, then inspect the result again.
Check the filename and keep the correct version
Tesla specifies a filename of up to 30 characters using letters, numbers, spaces, underscores, or dashes. A simple name such as my-tesla-wrap.png is easier to recognise and avoids unnecessary punctuation. Check whether your browser added a duplicate suffix such as parentheses after downloading the same name again. Use a short permitted name for the actual file you intend to transfer.
Confirm that the download really contains PNG image data; changing a JPEG's extension does not convert it. Recheck the dimensions and file size after any additional editing or optimisation. If you made several versions, compare the chosen image with the final preview so you do not transfer an older experiment. Keep the model information with the file even if you shorten the filename.
Move from designing to applying the wrap
Once the PNG is ready, follow how to upload custom wraps to your Tesla for the app and USB routes. Those steps begin with a completed file and cover transfer requirements and troubleshooting. If you are working entirely on a phone, use the mobile creation guide for saving and locating your download. This keeps your design decisions separate from problems with a file picker or USB stick.
You can also watch this template-editing and USB demonstration for a visual example of panel placement. Its image editor differs from this site's editor, so follow the demonstrated template principle rather than expecting identical buttons. Return to your matching vehicle template whenever a preview shows misplaced artwork. A finished wrap is the combination of a suitable model template, checked placement, and a saved PNG that satisfies the transfer requirements.